
We usually made decisions as a group; Sam and I decided to copy the
main editing file and start again because our first edit didn't look
like what we wanted it to. That was mostly the main decision we had
made, as every other decision was pretty much straight forward. We
also logged the shots and checked which shots we wanted to have in
our second thriller edit.


Before we started editing I actually thought that the clips would fit
together better than they actually do, which is giving us a little
bit more difficulty than first anticipated. As we do have to fit in
21 title/credit cards, this kind of solves our problem because it
gives us the possibility to use them as transition in place of
straight cuts in between different shots. This is all necessary for
us to be able to create a proper thriller that can be uploaded to
youtube and also for our coursework to be successful. To put together
our thriller we are using Adobe Premiere Pro, and to create/edit the
sounds, we are going to be using Garageband.
We started out by reviewing and selecting certain shots; out of the
55 we filmed, there are only around 11 or so which we can actually
use for our thriller; the rest is discarded because they may not
exactly look like what we wanted, or something went wrong during the
filming process. In the long run this is going to help us save time
when editing the actual thing, because we won't have to go back and
look through all the shots to see which ones we need, and which ones
are completely useless. Going back through all of the shots can take
up a lot of time. This is also why naming and re-naming clips is
actually quite important; we never went through and re-named our
clips, even though this would have been quite smart because it would
have saved us some time in the long run. Doing this gives you the
ability to keep track of what shot includes what and which ones are
useful, and which ones aren't.
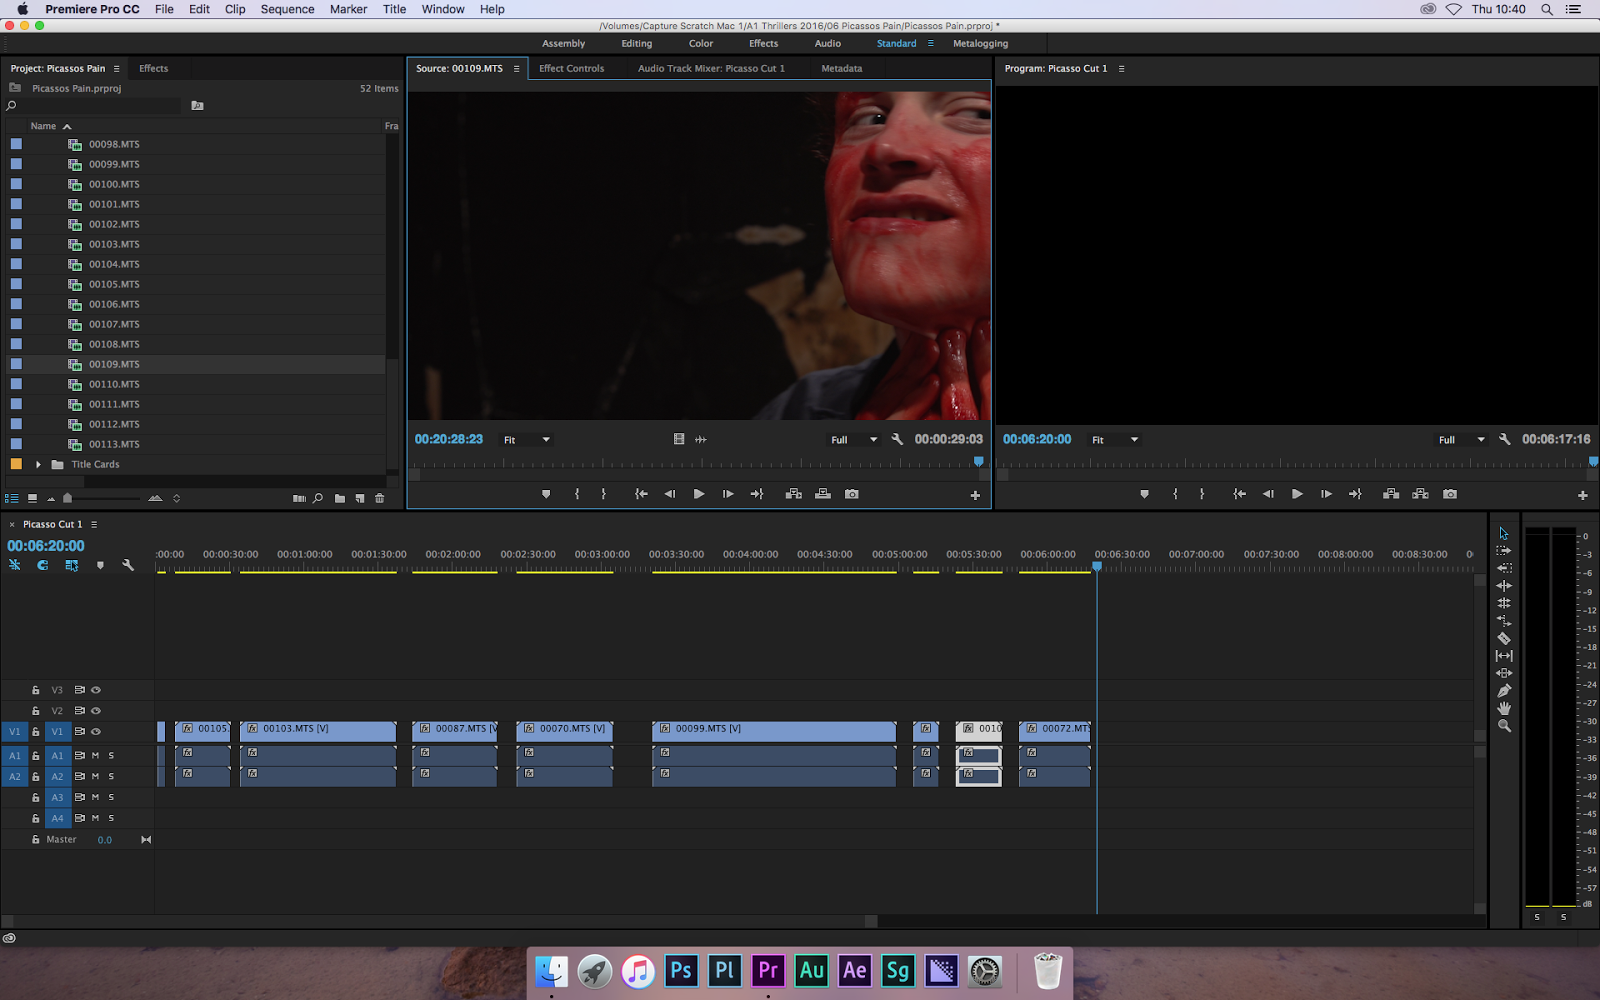

To edit our thriller we placed the shots on the timeline – this
enables us to put the different shots together and to see what they
would look like cut and put together. This is useful so we can
estimate what the final product would look like put together. We laid
out the shots in the order that we thought they should be in; this
can help us save time and see what the possible sequence could look
like. Also, the different “channels” help you to put the clips
together without accidentally cutting over another one. We are
currently working with three channel layers because it makes it
easier to have an overview of the entire timeline. Whilst editing,
even though we are editing with different channels, we have had to
crop all of our shots. Some of the clips we filmed go on forever, to
a point where people eventually get bored of the video or feel
uncomfortable, and others might not be needed, or appropriate, for
the final cut. To cut down the clips we either used the intro (“I”)
and outro (“O”) commands, which give us the ability to cut down
the clips whilst they are still on the clipboard, or the
cut/razor/blade tool for when the clips were already on the timeline
and we didn't think that certain parts of these clips should be
included. We also used the razor tool to cut a few of our clips in
half because we have had to slow parts of our clips down and cutting
them made it easier for us to get the result we wanted to. This
helped us with our shot composition because that gives us the ability
to re-cut every single clip that is on the timeline without there
being a big hassle; this way we could make them look right after we
had added them to the timeline.


For us its a little bit more complicated to put the clips together
properly because we don't quite have the linear storyline many other
openings have. We have to pay extra close attention to the actions
within and the movement of the shots, then match them and for the
video to flow properly. This is why we also have to use black title
cards, because otherwise the transitions wouldn't be quite as smooth
and it would be evident that the video has been edited. As an editor
your main goal is to put the clips together to an extent where the
viewer would not notice, and with our thriller it's very difficult to
do that successfully. It can either go really well or could fall
apart entirely.


Well done for making this a visual post. However consider the layout of your pictures, and use them throughout your essay as well. You clearly understand the process, and add the detail and terminology to make this a detailed post. In order to develop it further don’t forget to add creative choices you made as well.
ReplyDelete